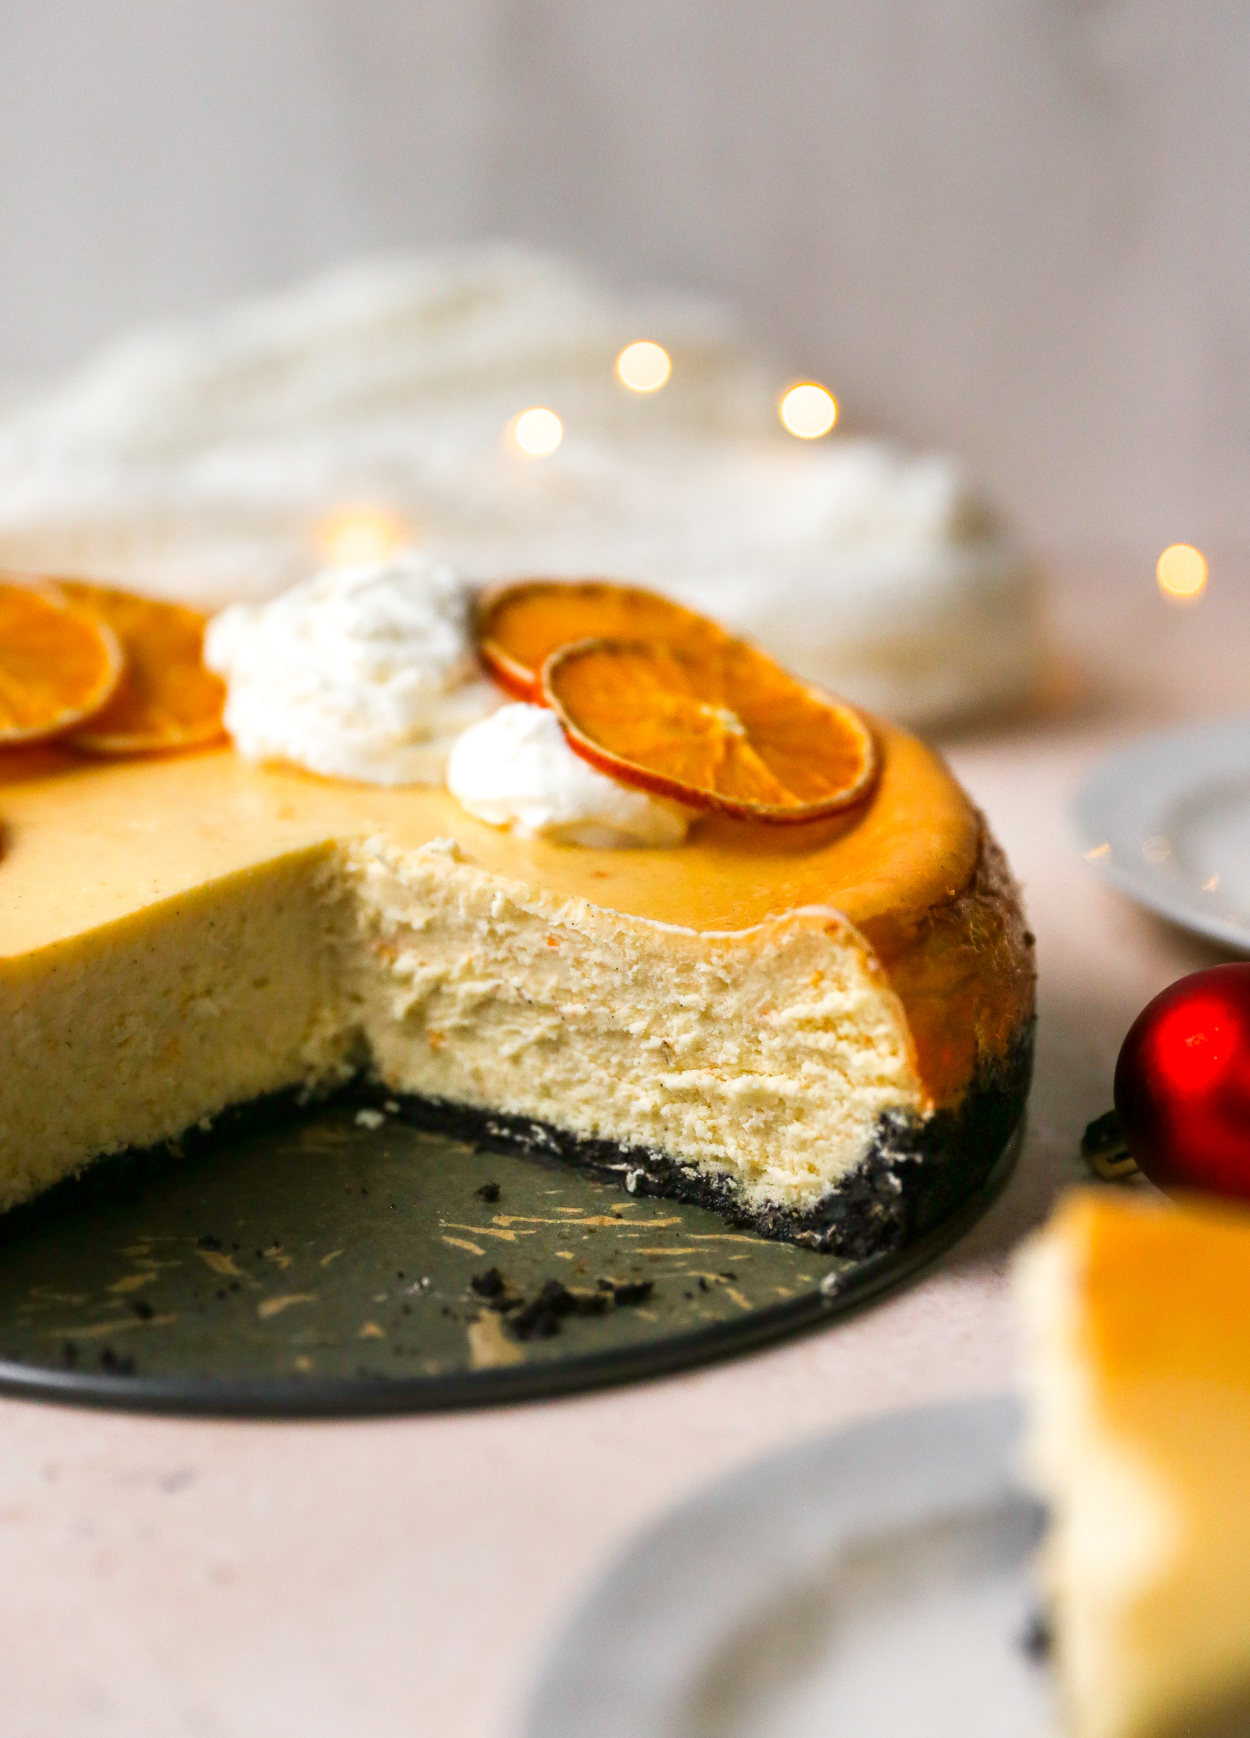
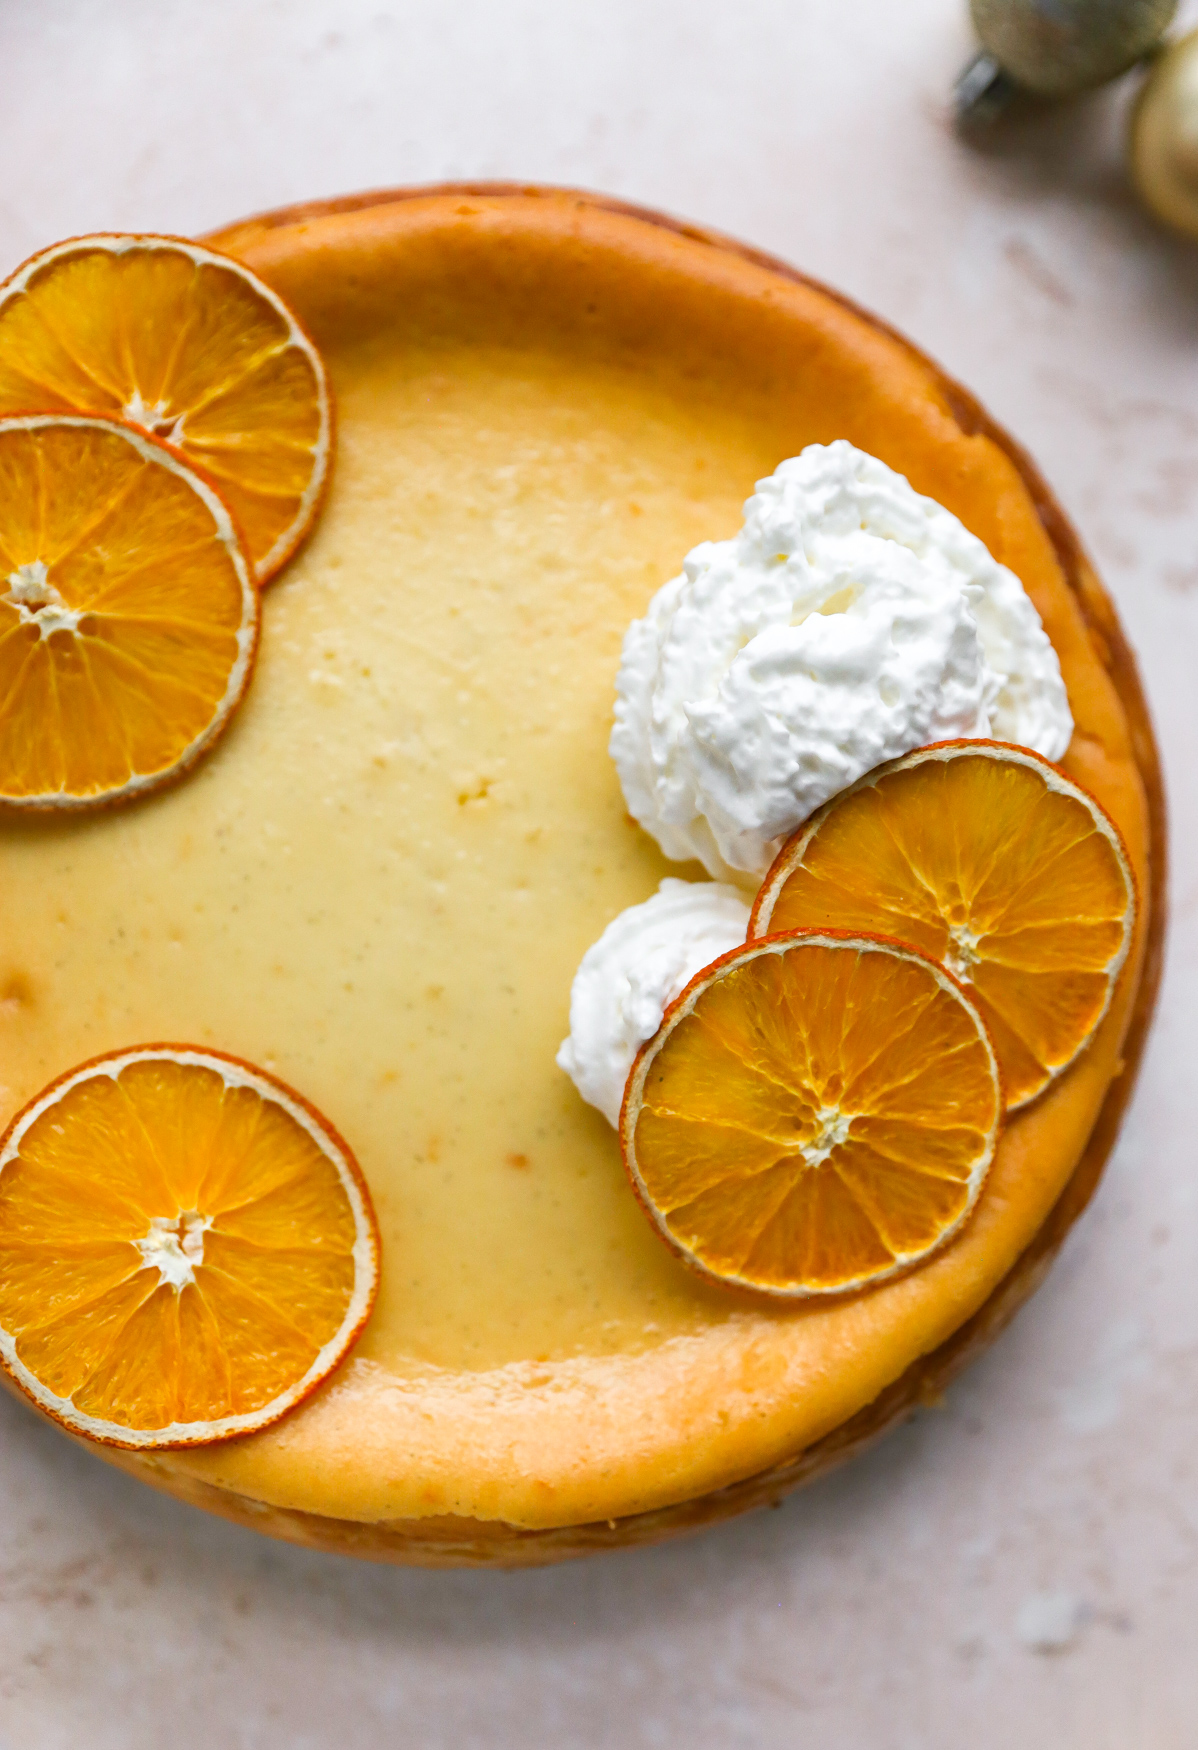
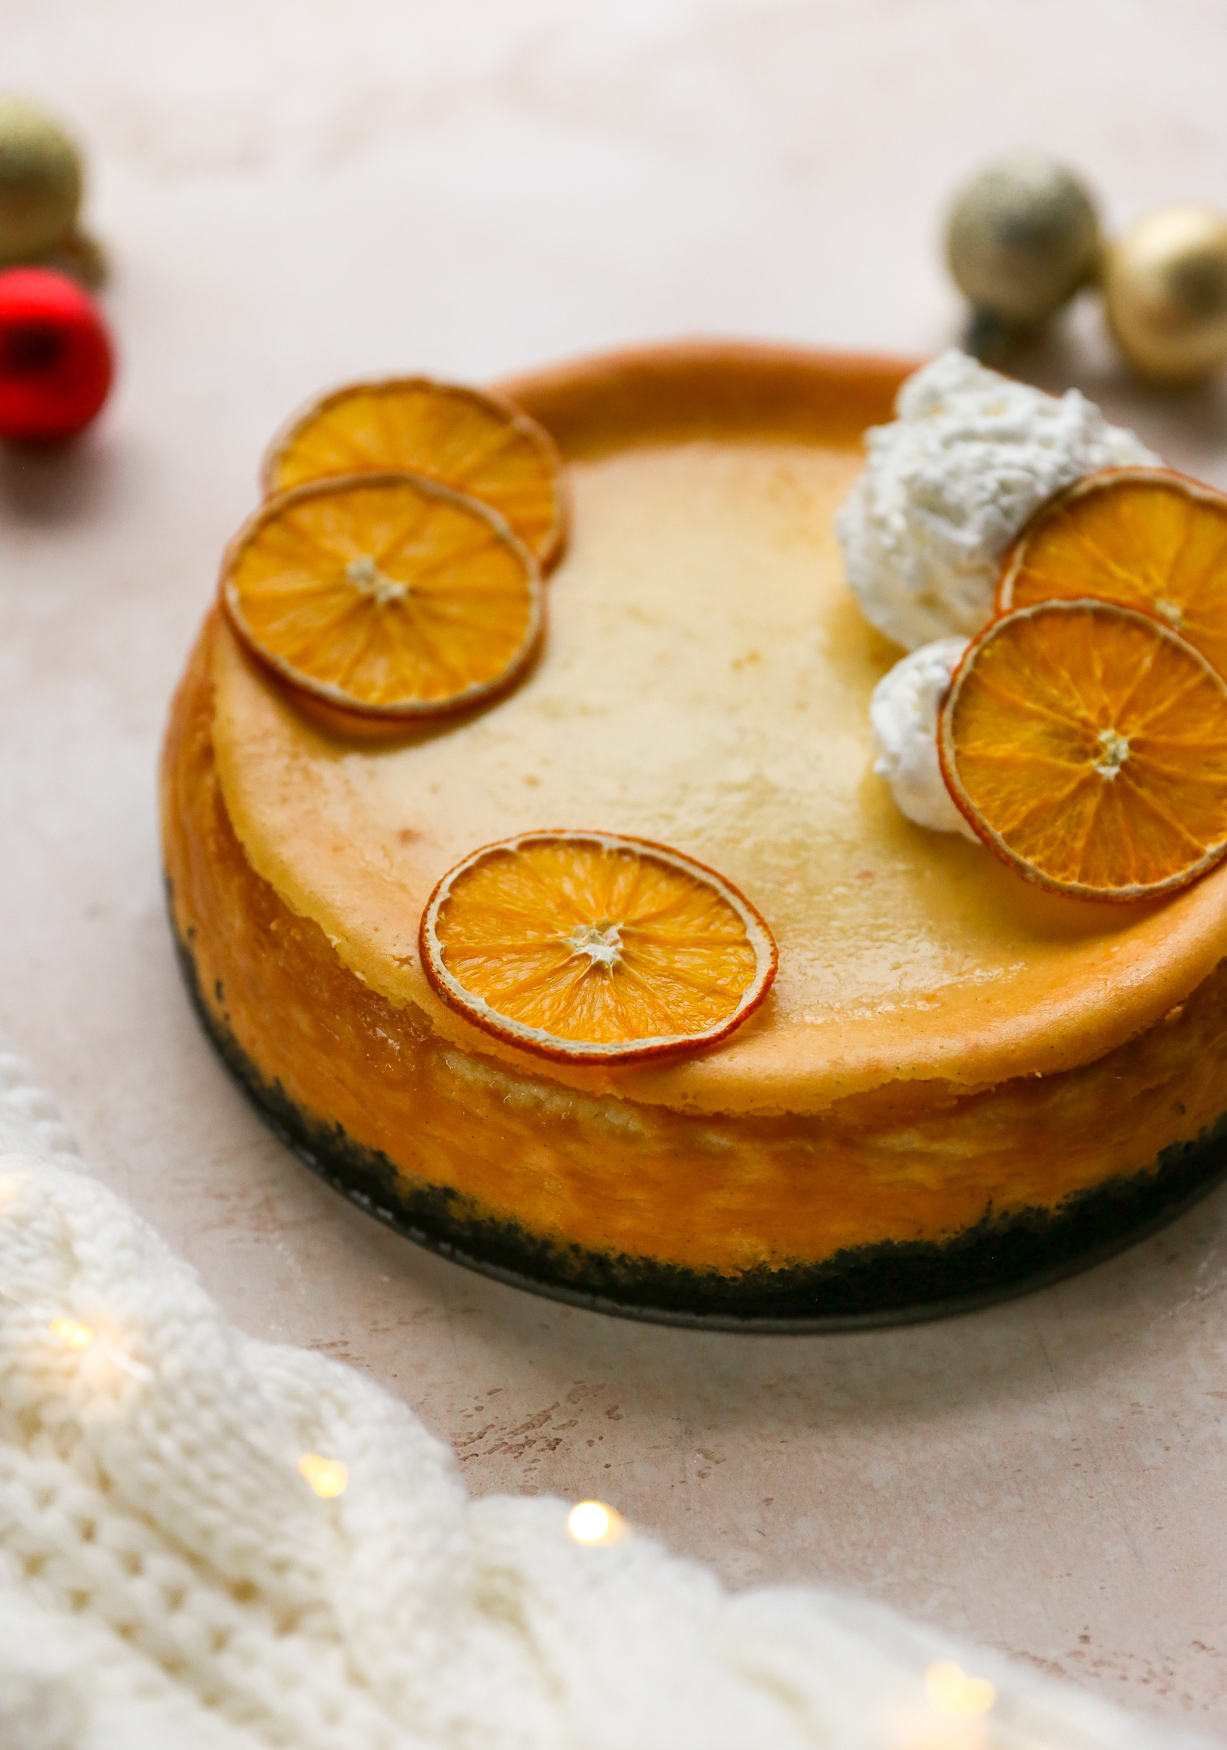
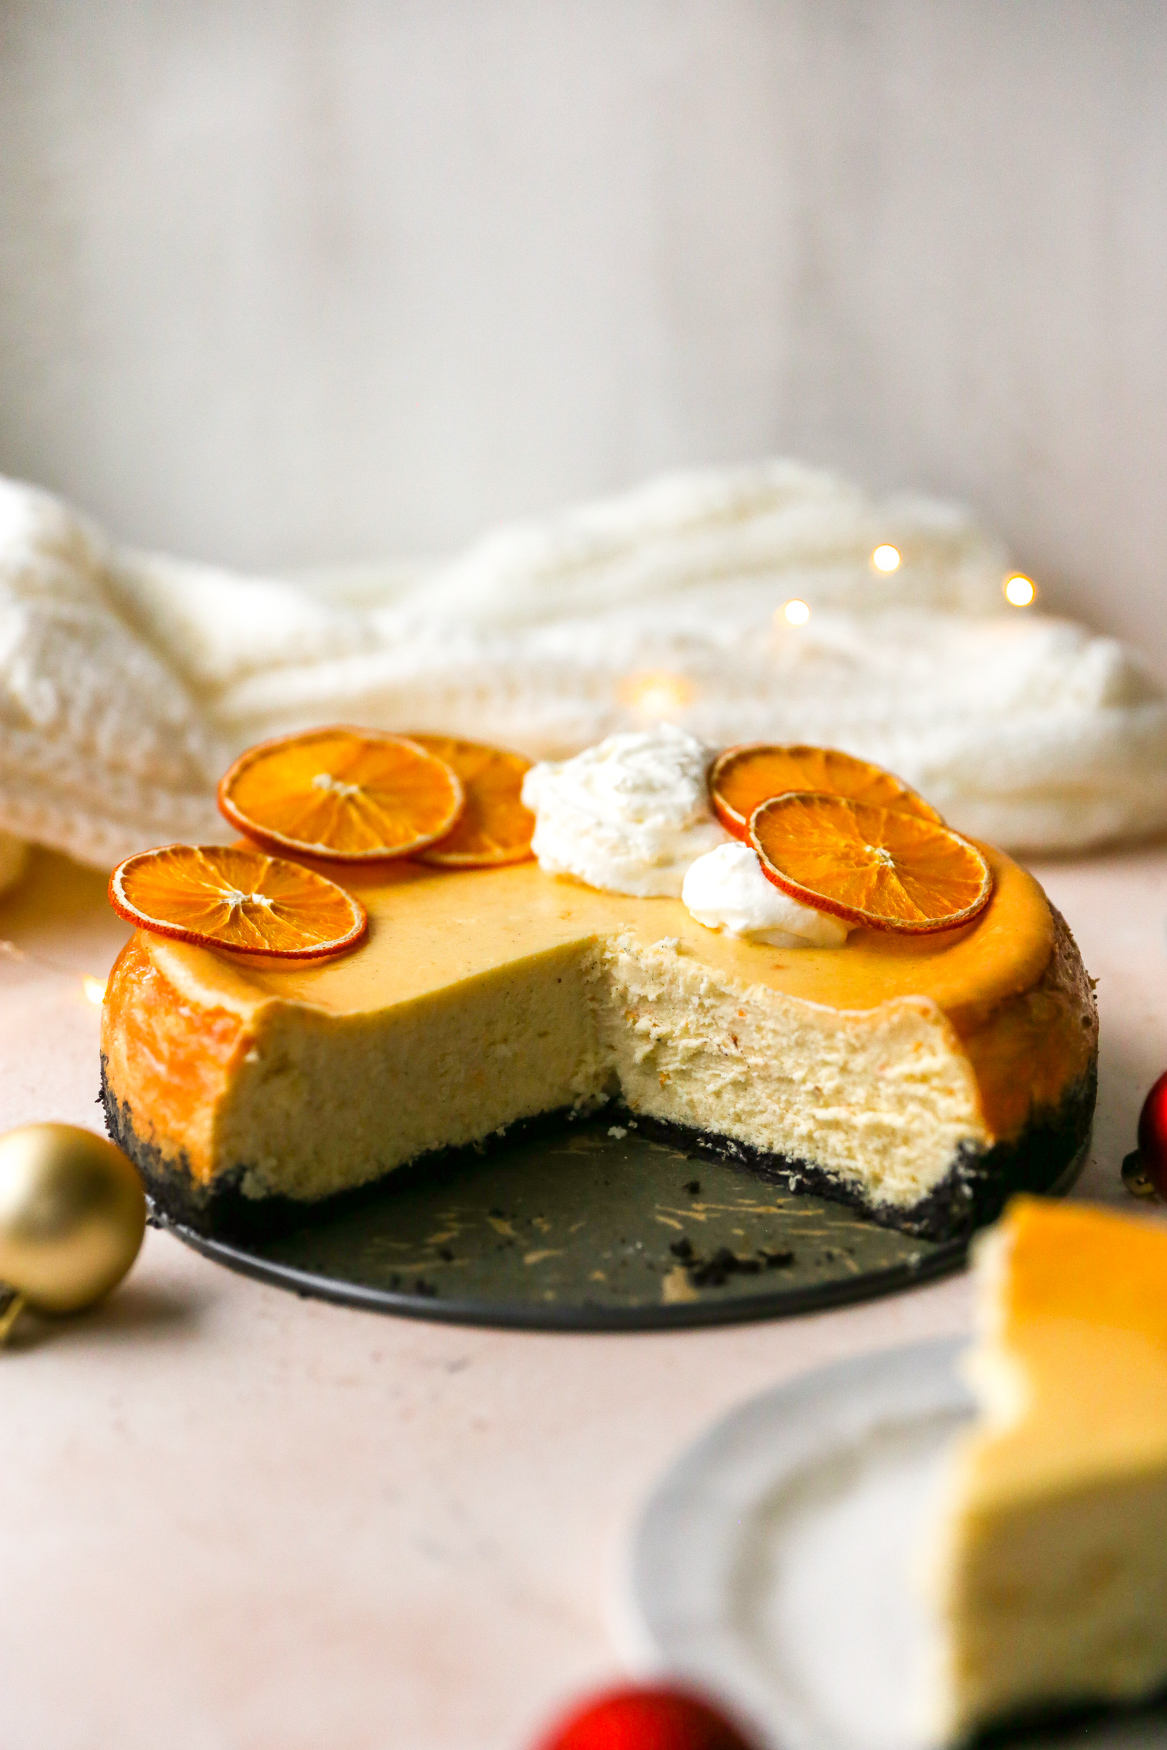
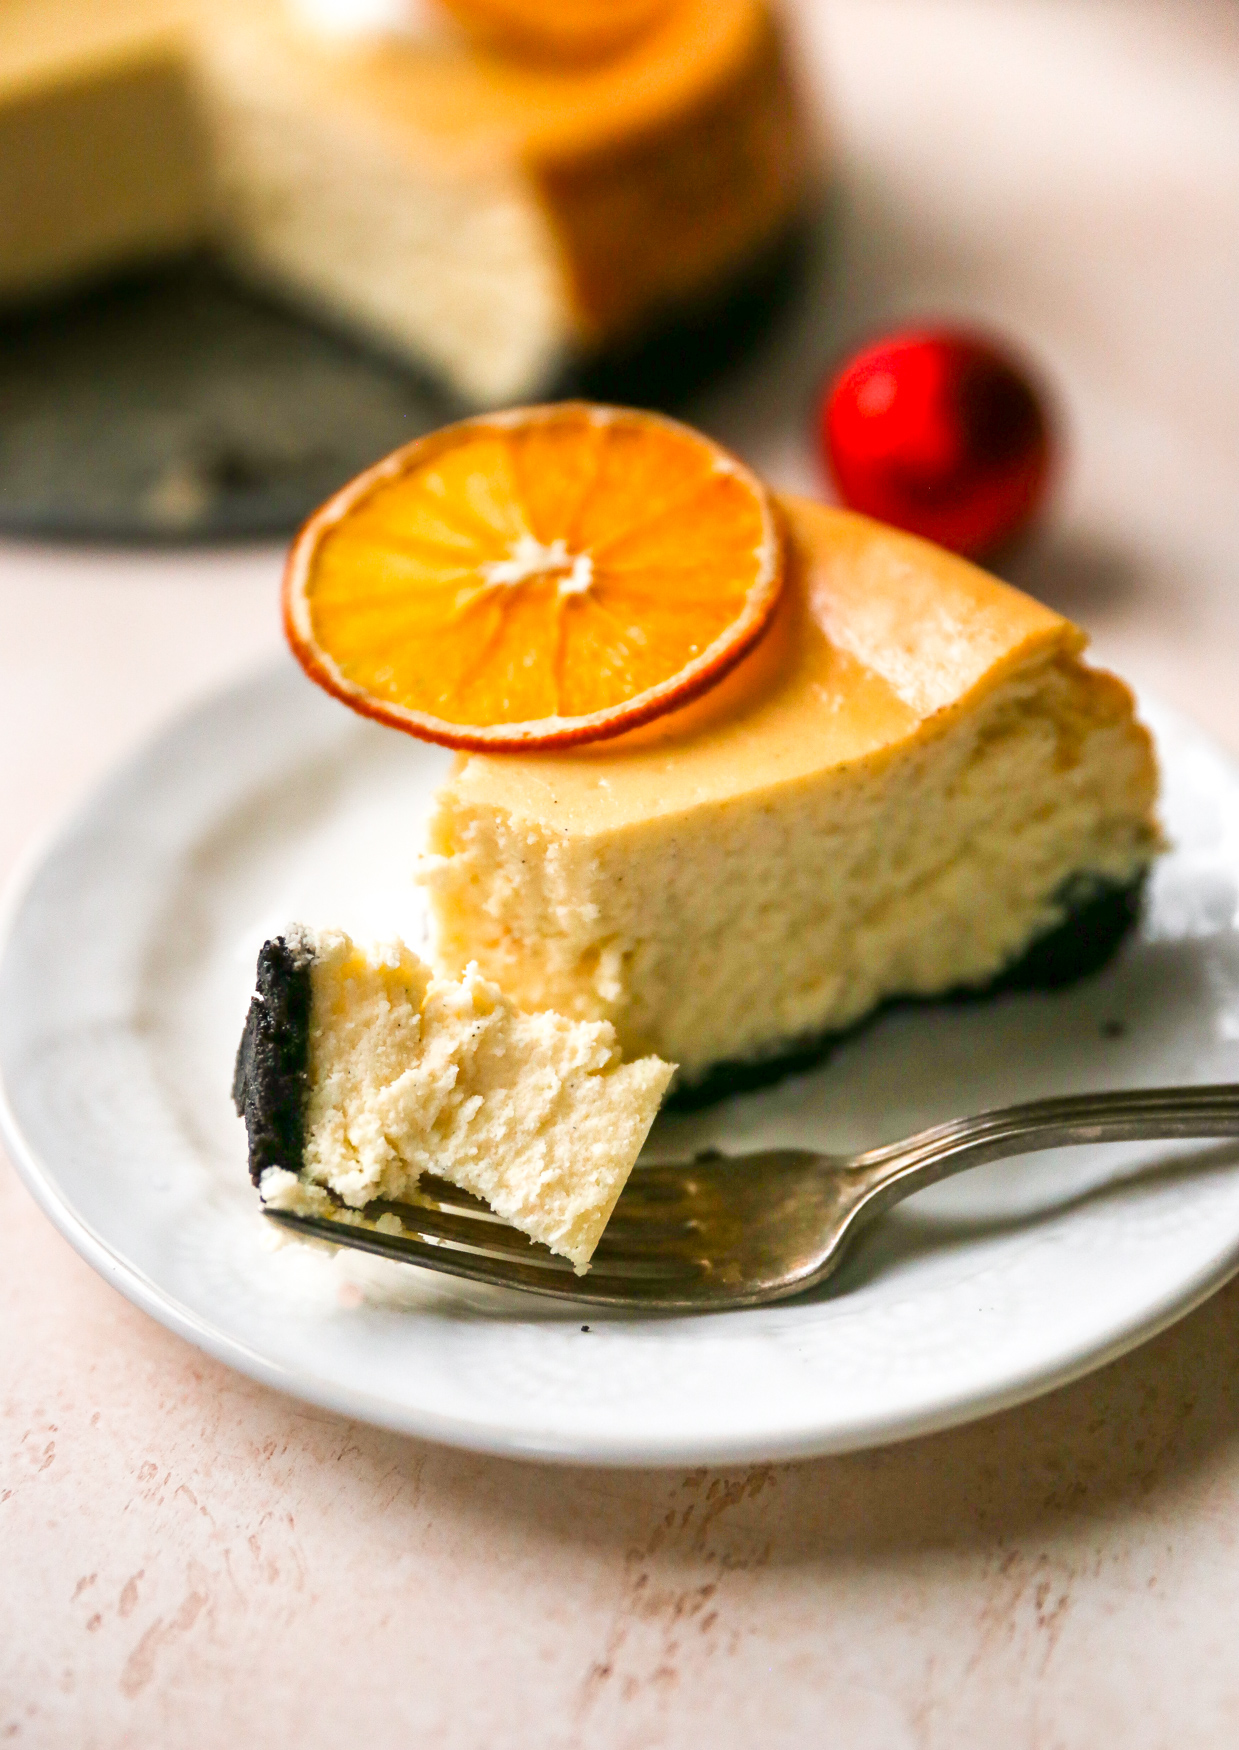
This Clementine Vanilla Bean Cheesecake is a show stopping dessert that features sweet clementines, a creamy vanilla bean base, and a chocolate cookie crust! It is made for special occasions, like the holidays. Creamy and decadent with a bright citrus flavor – it’s really quite special.

This Clementine Vanilla Bean Cheesecake was the very first cheesecake recipe I made. Ever.
The reason being that I’m not a huge fan of plain cheesecake. One or two bites and I’m good. It’s generally too rich for me.
I do, however, love flavored cheesecakes! The addition of other flavors, whether it be fruit, chocolate, or whatever, always seems to cut down on the richness.
This cheesecake idea had been brewing in my head for months and months. I wanted to try my hand at homemade cheesecake, and I wanted to make it one that I would actually enjoy (read: flavor infused).
I knew that the classic combination of orange and chocolate was a safe bet…but I didn’t want to do just a regular ol’ orange cheesecake. It’s been done!
Enter the clementine. One of my most favorite things about this time of year: it’s clementine season. I LOVE these little citrus gems! They are sweet and tender and absolutely crazy delicious. I buy them by the crate weekly.
So, I decided that making a CLEMENTINE cheesecake was the answer. Add in a chocolate cookie crust and we’ve got that combo covered. Golden.
Let me tell you how to make this baby!
Ingredients You Need to Make This Clementine Vanilla Bean Cheesecake:
- Chocolate wafer cookies
- Unsalted butter
- Full-fat cream cheese
- Granulated sugar
- Cornstarch
- Kosher salt
- Full-fat sour cream
- Fresh clementine zest and juice
- Vanilla bean paste (or extract)
- Eggs
- Dehydrated orange slices — optional for decoration. See recipe below.
- Whipped cream
How to Make This Clementine Vanilla Bean Cheesecake:
Start with the Crust:
- Preheat the oven to 350°F.
- Place roughly 30 chocolate wafers in the bowl of a food processor. Pulse the machine until fine crumbs form.
- With the machine running, slowly stream in melted butter. Run until all the crumbs are moistened by the butter and beginning to clump together.
- Generously spray a 9-inch springform pan with nonstick cooking spray on the bottom and sides. Line the bottom and sides of the pan with parchment paper (I do one round piece for the bottom and a thin strip that runs around the sides). Spray the parchment paper with nonstick cooking spray.
- Press the crumb mixture into the pan, firmly packing it to form the crust. It should fully cover the bottom of the pan and up a little bit on the sides of the pan.
- Bake the crust for 10 minutes.
Make the Filling:
- Set a kettle or pot of water on to boil.
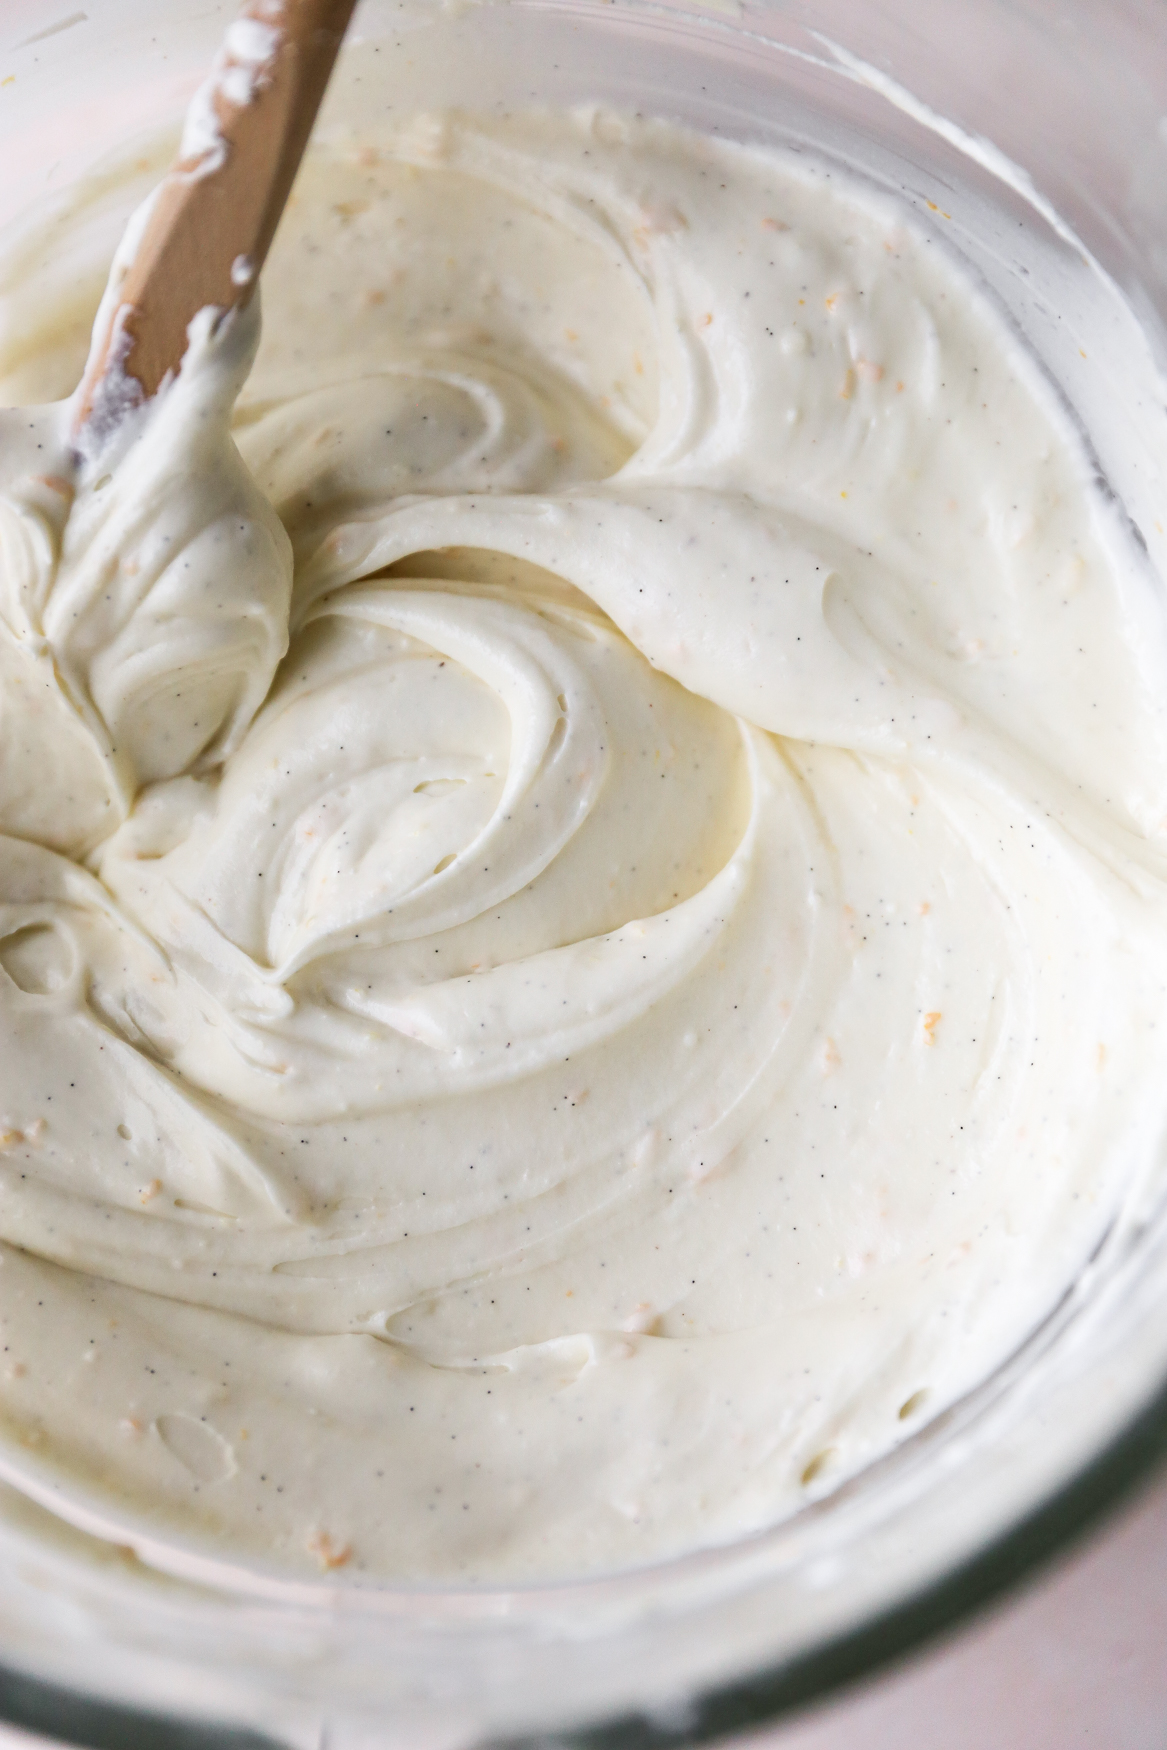
- While the crust is baking, make the filling by combining the blocks of cream cheese in a stand mixer (alternatively, you can mix it in a bowl with a hand mixer). Beat the cream cheese together until smooth and creamy. It’s important to thoroughly cream the cream cheese before adding the other ingredients – it makes for a silky smooth filling.
- After the cream cheese is smooth, stir it with a spatula to remove any excess air that may have been incorporated. Excess air can cause your cheesecake to crack during baking.
- Beat in the sugar, cornstarch, salt, sour cream, clementine juice and zest, and vanilla until smooth. Again, scrape down the sides and stir the mixture with a spatula to remove excess air.
- Add the eggs and egg yolk, one at a time, and beat after each addition until the filling is smooth and creamy.
- Take your spatula and once again stir the batter a few times, taking out any excess air that may have been incorporated.
Baking the Cheesecake:
- Reduce the oven temperature to 325°F and place a large baking dish on the bottom rack of the oven. Carefully pour the boiling water (I find that using a kettle for this is easiest) into the baking dish and close the oven door.
- Pour the cheesecake filling into the crust and smooth out the top. Rap the pan gently on the counter a few times to remove any air bubbles in the filling.
- Transfer the cheesecake to the oven, setting it on the middle rack above the baking dish with water, and close the door quickly so that all the moisture does not escape.
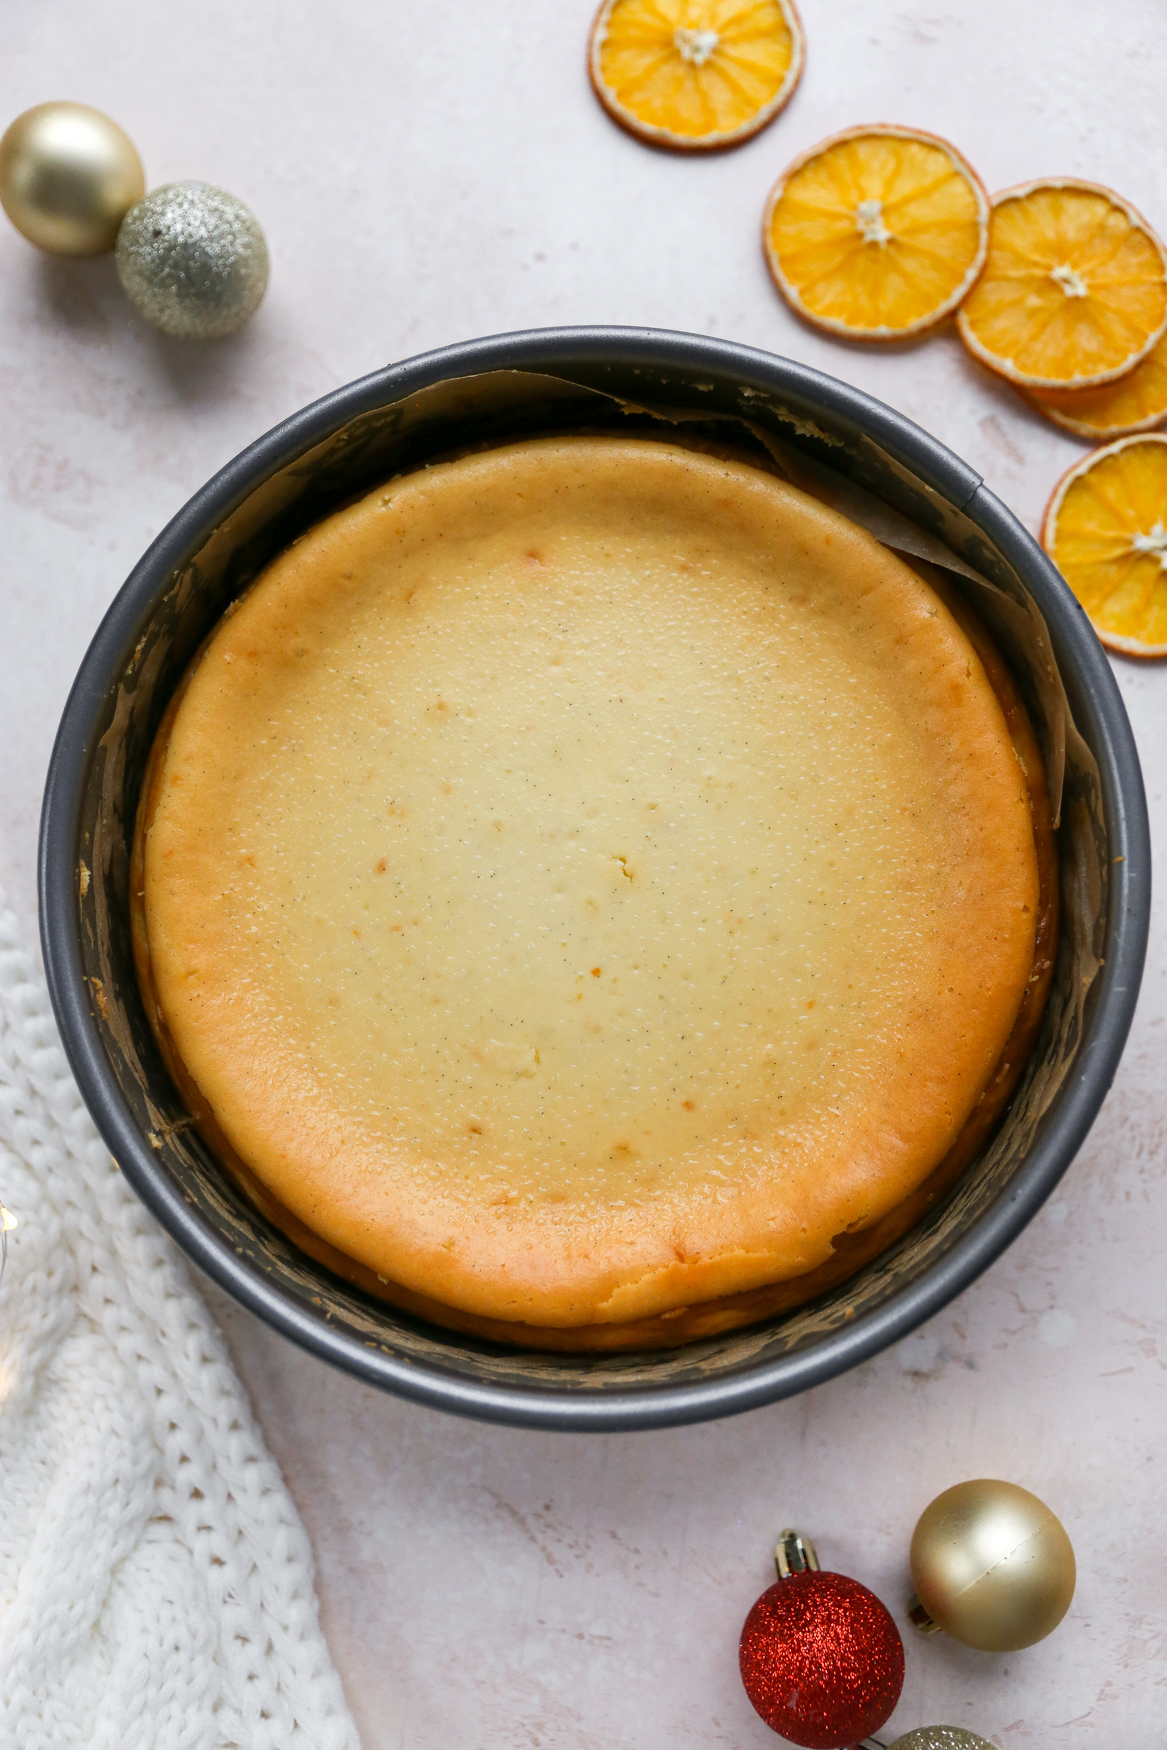
- Bake for 1 hour 15 minutes or until the cheesecake is puffed and set around the edges and has a slight jiggle in the center when you shake the pan. Start checking it around 1 hour (all ovens are different and actual cooking time may vary a bit). If it is not done, keep baking in 15-minutes increments, checking after each for doneness.
Cooling the Cheesecake:
- Turn off the oven and crack open the oven door. Allow the cheesecake to sit in the oven with the door open for 1 hour.
- After 1 hour, remove the cheesecake from the oven and allow it to cool to room temperature.
- Once it is cool, transfer the cheesecake to the fridge for a minimum of 4 hours (longer is actually better – I prefer to do it overnight).
To Serve:
- Remove the cheesecake from the fridge and gently and carefully remove the collar from the springform pan. Peel off any parchment paper that may be sticking to the cheesecake.
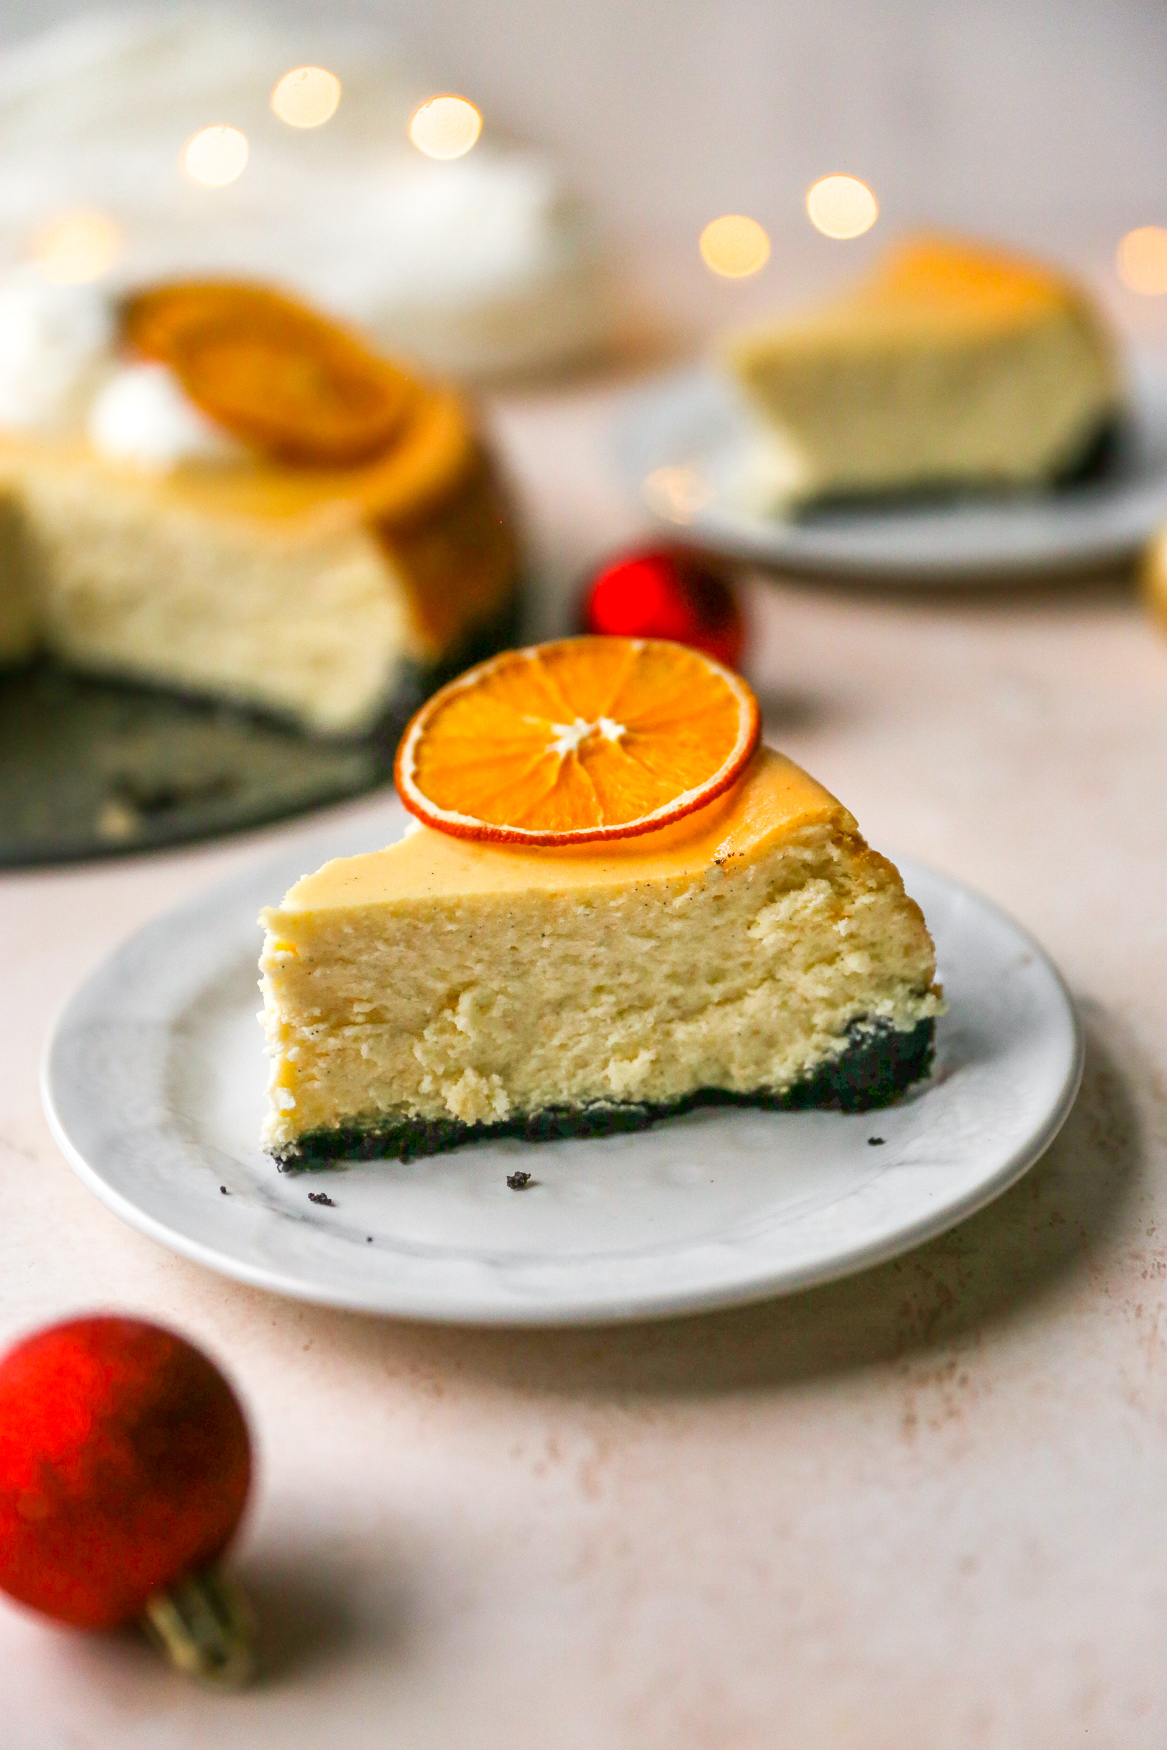
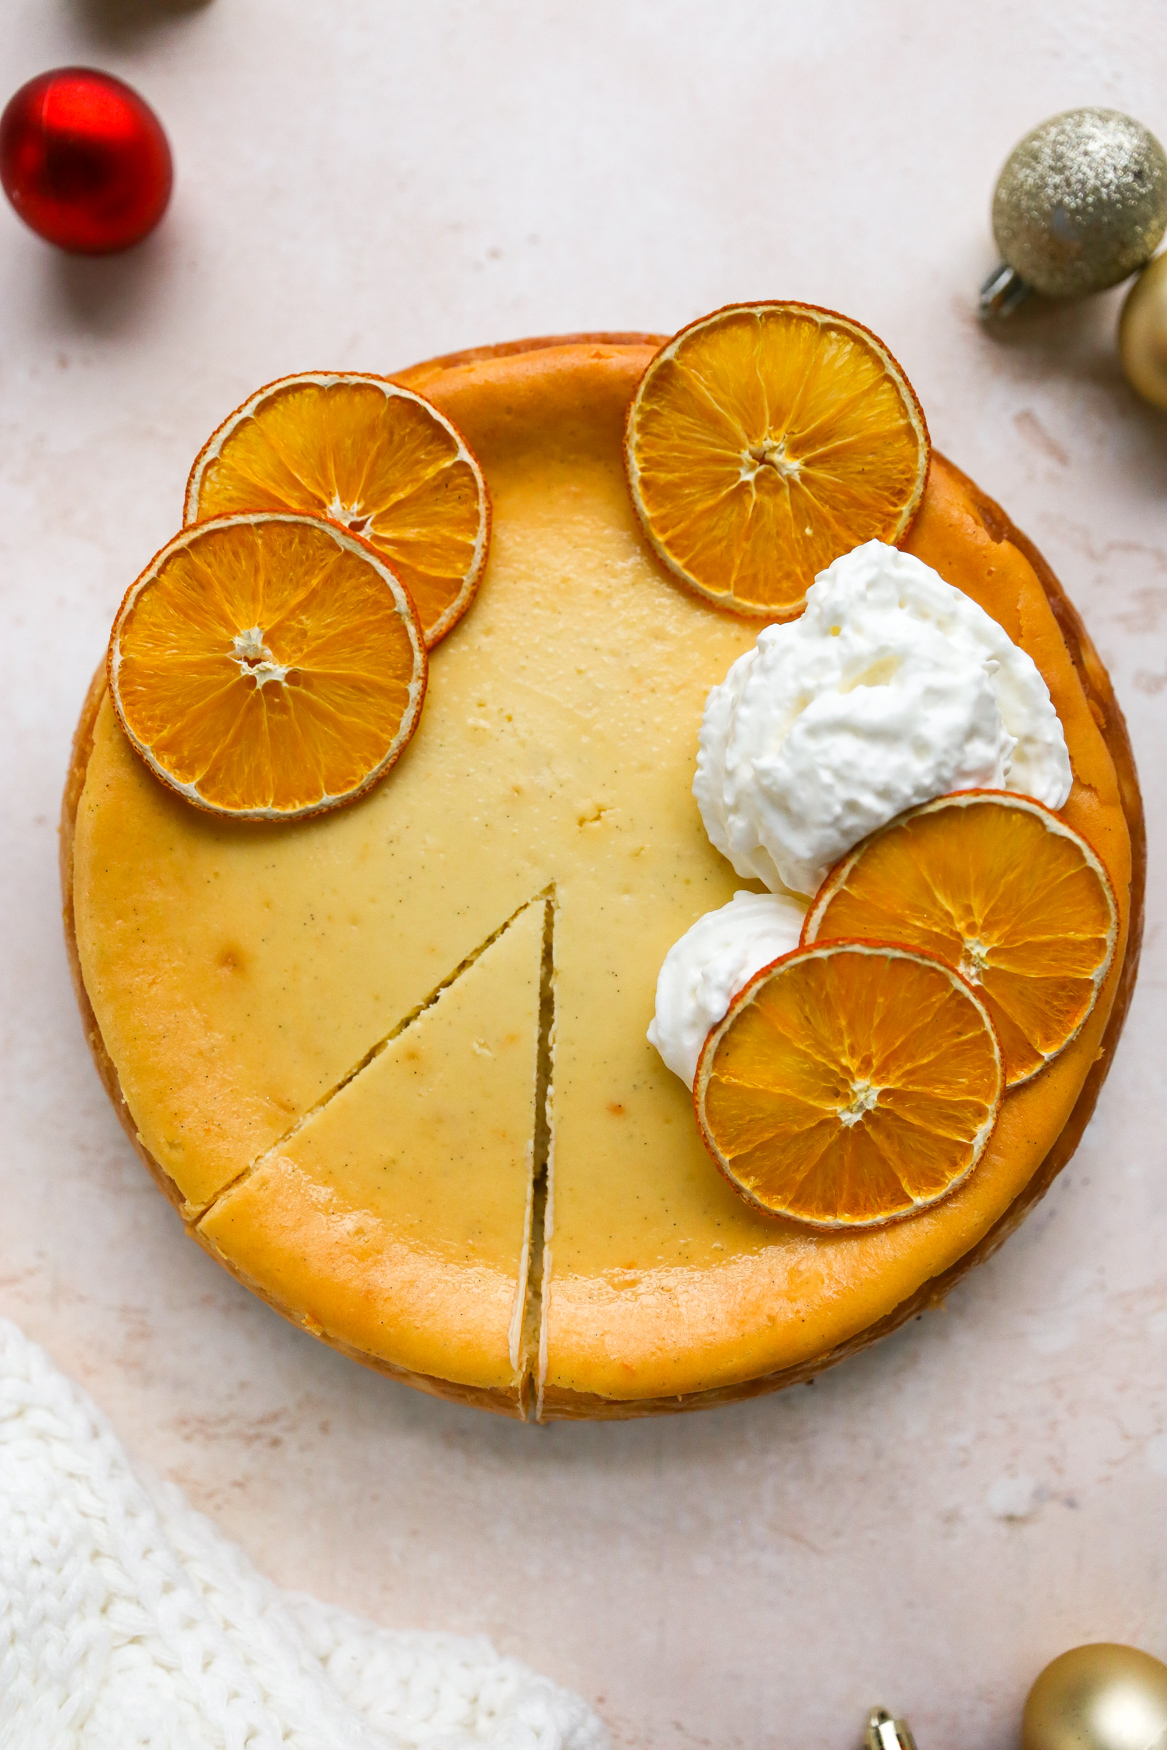
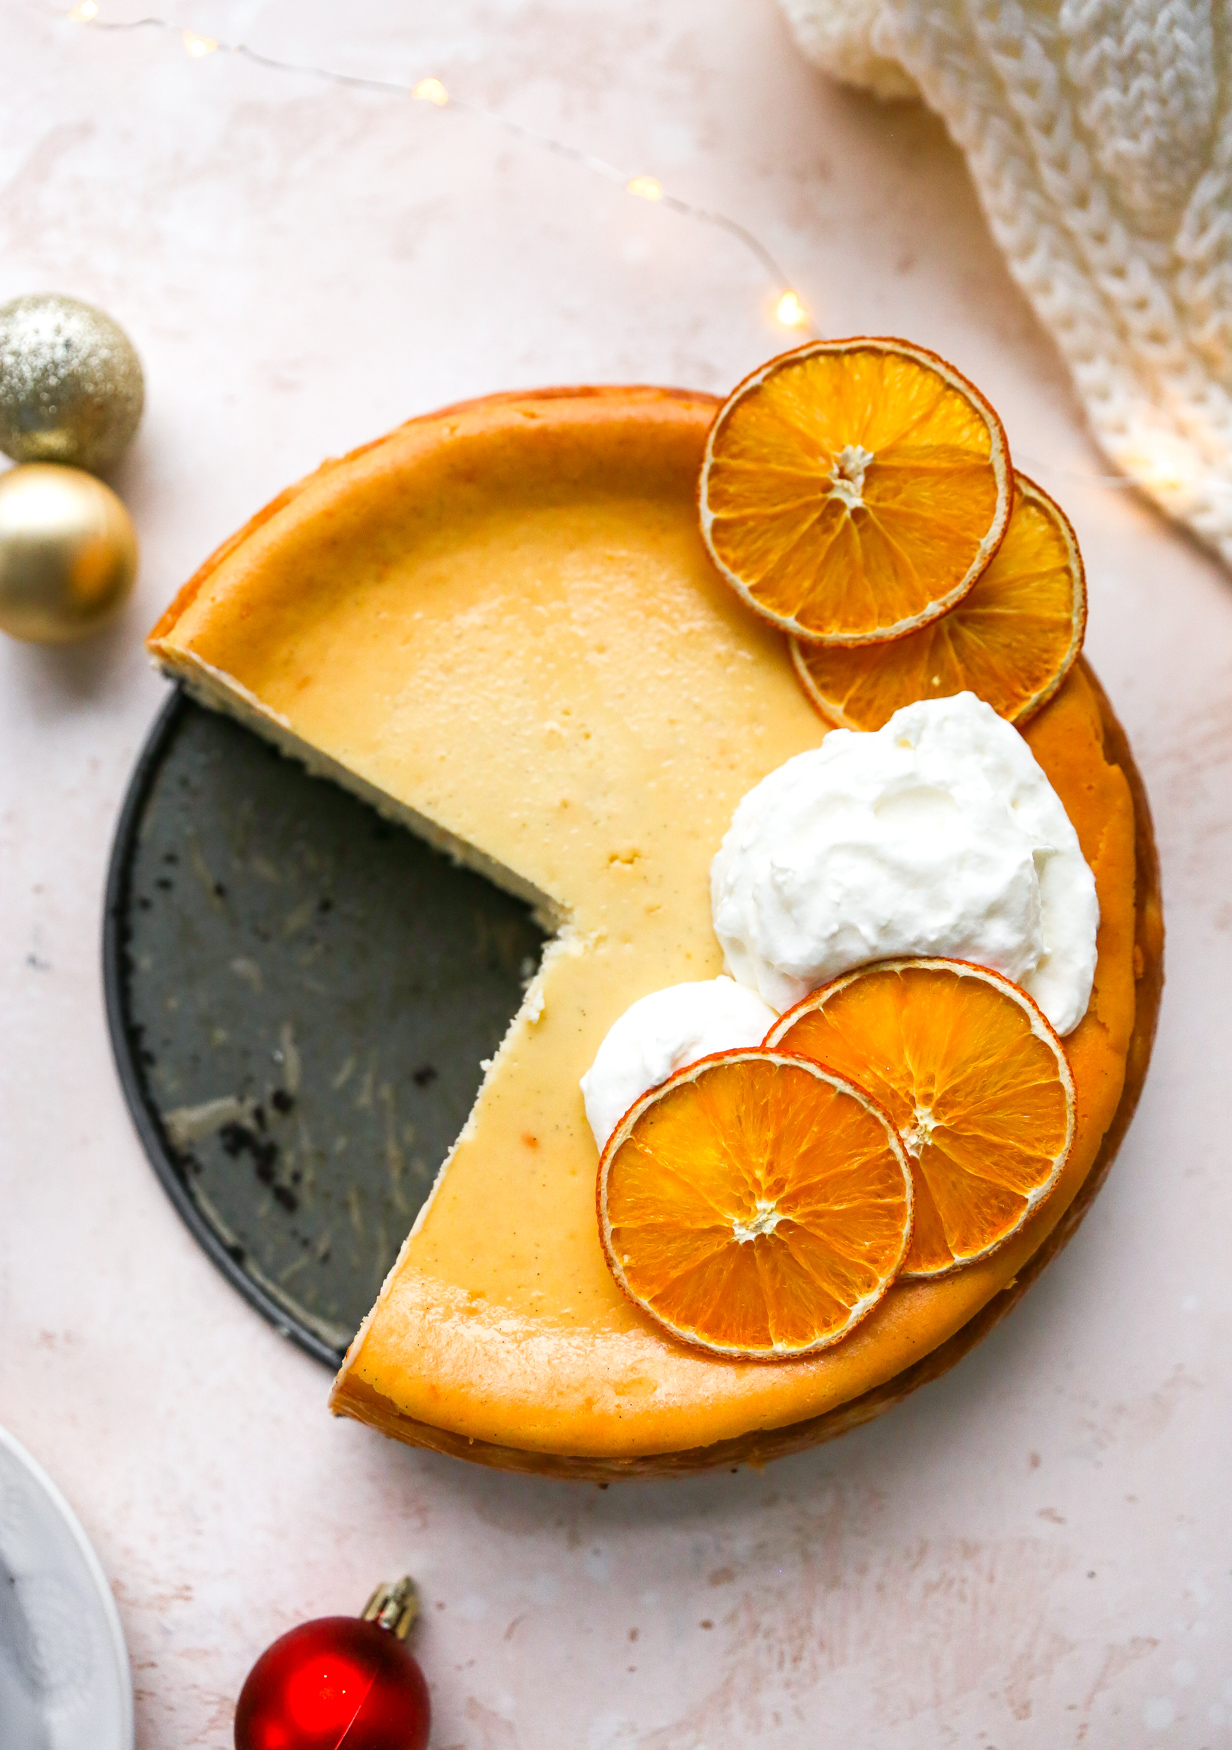
- Arrange dollops of whipped cream on the top and decorate with dehydrated orange slices (all optional). The recipe below outlines how to make the dehydrated oranges.
- Slice with a very sharp knife and serve.
Other Recipes You Might Enjoy:
- No-Bake Cheesecake Cups with Caramelized Figs
- No-Bake Lemon Cheesecake Cups
- Roasted Winter Citrus
- Blood Orange Yogurt Bundt Cake
- Clementine Creamsicle Margaritas with Chili Salt
- Boozy Clementine Lemonade with Brûléed Citrus & Mint
- Vanilla Bean Orange Cardamom Rolls
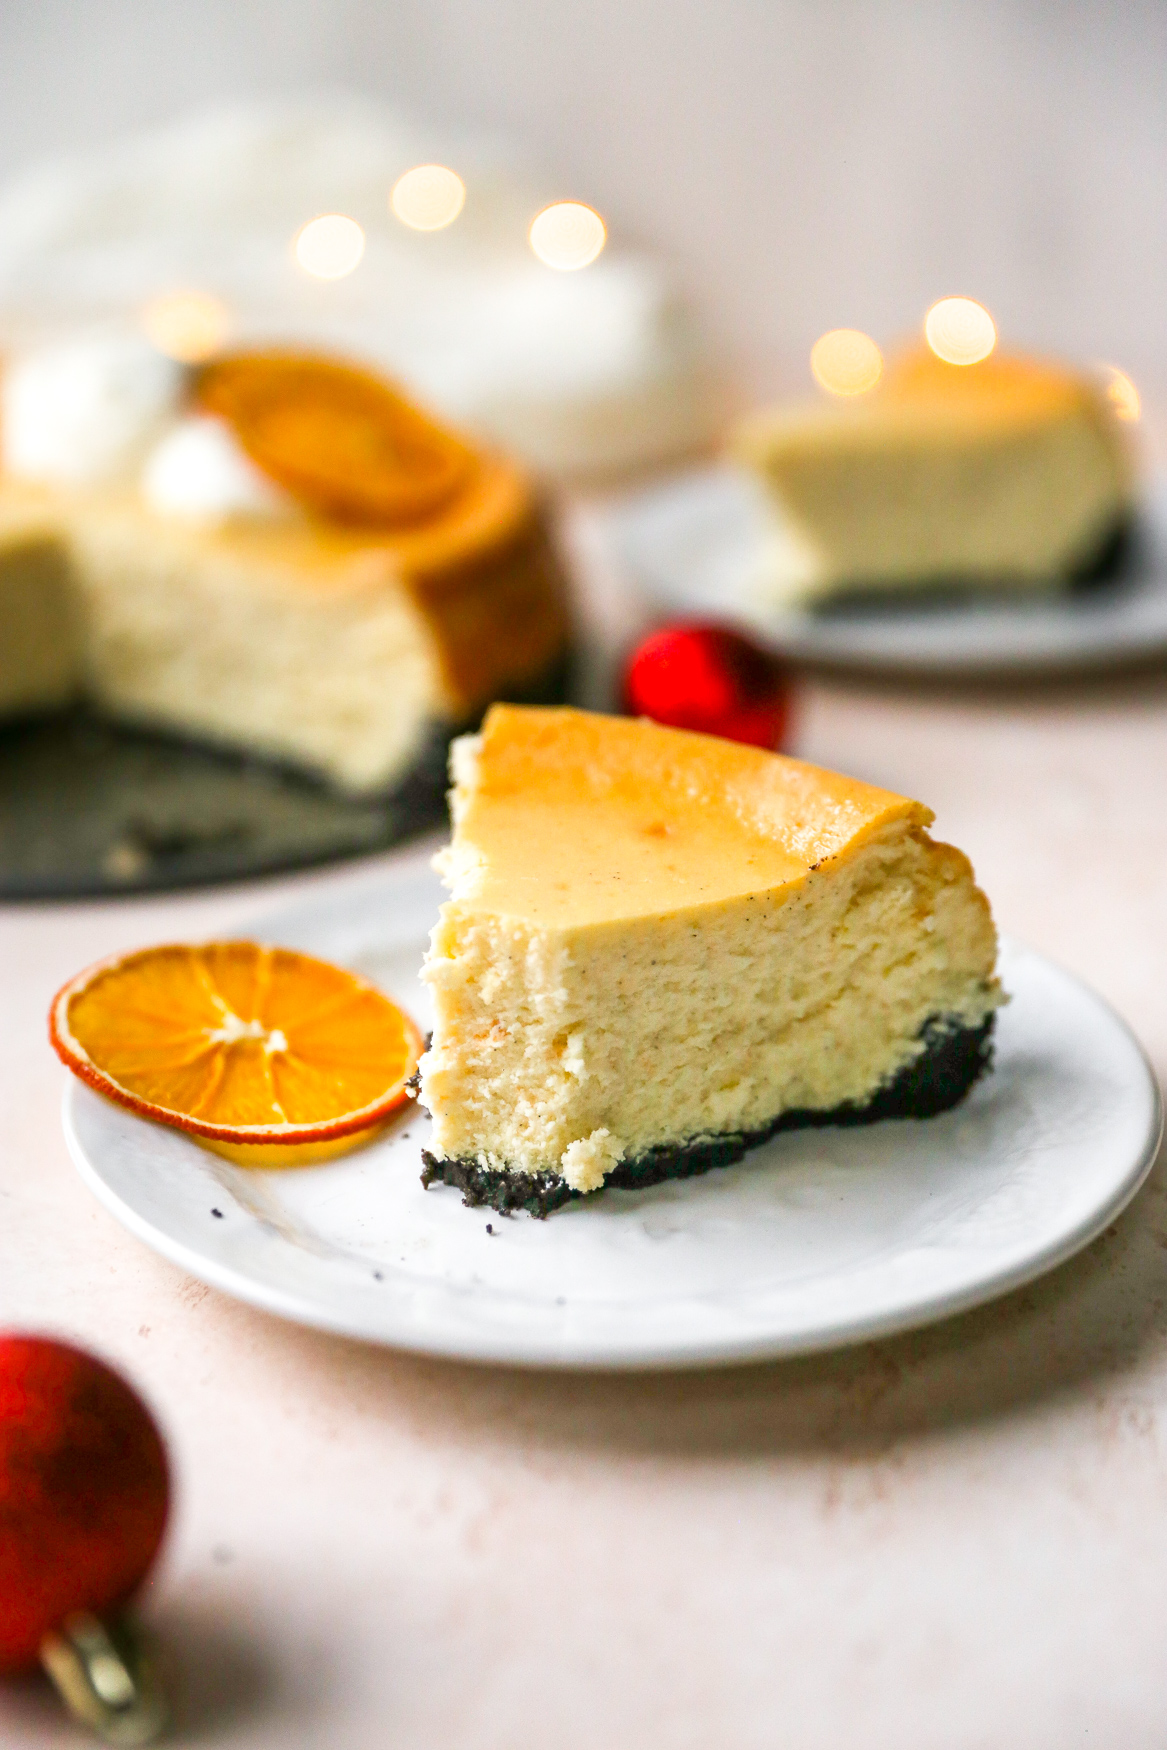
I was so pleased with the way this came out. I mean, not only did it look beautiful, but it tasted even better!
This is a very impressive dessert, in my humble opinion. I mean, I would be so excited to have something like this served to me! It’s perfect for this holiday season – not only is it fancy-schmancy, but it’s seasonally appropriate with all the citrus flavor we have here.

If I can do it, you can do it. Just etch out enough time for yourself to make, bake, and chill this baby and you’ll be the talk of the town.
It’s incredible. Trust me.
@yestoyolks ✨Clementine Vanilla Bean Cheesecake✨ Sweet clementines, a creamy vanilla bean base, and a chocolate cookie crust makes this one stand out. This cheesecake is dreamily creamy yet light and fluffy at the same time with bright citrus flavor. It is made for special occasions, like the holidays! FULL RECIPE on yestoyolks.com! #foodtiktok #recipes #cookingvideo #cookingtiktok #recipeideas #recipesforyou #cheesecakerecipe #clementine #vanillabean #holidaybaking #christmasrecipes ♬ A Holly Jolly Christmas – Instrumental – Molly Tapia
FOLLOW ME ON TIKTOK FOR MORE VIDEOS!
Print
Clementine Vanilla Bean Cheesecake
- Total Time: 2 hours 30 minutes (plus chilling time)
- Yield: 8–10 servings 1x
Description
This Clementine Vanilla Bean Cheesecake is a show stopping dessert that features sweet clementines, a creamy vanilla bean base, and a chocolate cookie crust! It is made for special occasions, like the holidays. Creamy and decadent with a bright citrus flavor – it’s really quite special.
Ingredients
For the Crust:
- 2 cups finely crushed chocolate wafers
- 4 tablespoons unsalted butter, melted
For the Filling:
- 4 (8-oz) packages full-fat cream cheese, at room temperature
- 1 1/4 cups granulated sugar
- 2 tablespoons cornstarch
- 1/2 teaspoon kosher salt
- 3/4 cup full-fat sour cream
- Zest of 4 clementines (roughly 2 tablespoons zest)
- Juice of 1 clementine (roughly 2 tablespoons juice)
- 2 teaspoons vanilla bean paste (or extract)
- 3 large eggs, at room temperature
- 1 large egg yolk, at room temperature
To Serve:
- Dehydrated orange slices (optional – for decoration more than anything. See recipe below)
- Whipped cream
Instructions
For the Crust:
- Preheat the oven to 350°F.
- Place roughly 30 chocolate wafers in the bowl of a food processor. Pulse the machine until fine crumbs form.
- With the machine running, slowly stream in the melted butter. Run until all the crumbs are moistened by the butter and beginning to clump together.
- Generously spray a 9-inch springform pan with nonstick cooking spray on the bottom and sides. Line the bottom and sides of the pan with parchment paper (I do one round piece for the bottom and a thin strip that runs around the sides). Spray the parchment paper with nonstick cooking spray.
- Press the crumb mixture into the pan, firmly packing it to form the crust. It should fully cover the bottom of the pan and up a little bit on the sides of the pan.
- Bake the crust for 10 minutes.
- Remove from the oven and allow to cool while you finish prepping the rest of the cheesecake.
For the Filling:
- Set a kettle or pot of water on to boil.
- While the crust is baking, make the filling by combining the blocks of cream cheese in a stand mixer (alternatively, you can mix it in a bowl with a hand mixer). Beat the cream cheese together until smooth and creamy. It’s important to thoroughly cream the cream cheese before adding the other ingredients – it makes for a silky smooth filling.
- After the cream cheese is smooth, stir it with a spatula to remove any excess air that may have been incorporated. Excess air can cause your cheesecake to crack during baking.
- Beat in the sugar, cornstarch, salt, sour cream, clementine juice and zest, and vanilla until smooth. Again, scrape down the sides and stir the mixture with a spatula to remove excess air.
- Add the eggs and egg yolk, one at a time, and beat after each addition until the filling is smooth and creamy.
- Take your spatula and once again stir the batter a few times, taking out any excess air that may have been incorporated.
- Baking the Cheesecake:
- Reduce the oven temperature to 325°F and place a large baking dish on the bottom rack of the oven. Carefully pour the boiling water (I find that using a kettle for this is easiest) into the baking dish and close the oven door.
- Pour the cheesecake filling into the crust and smooth out the top. Rap the pan gently on the counter a few times to remove any air bubbles in the filling.
- Transfer the cheesecake to the oven, setting it on the middle rack above the baking dish with water, and close the door quickly so that all the moisture does not escape.
- Bake for 1 hour 15 minutes or until the cheesecake is puffed and set around the edges and has a slight jiggle in the center when you shake the pan. Start checking it around 1 hour (all ovens are different and actual cooking time may vary a bit). If it is not done, keep baking in 15-minutes increments, checking after each for doneness.
- Turn off the oven and crack open the oven door. Allow the cheesecake to sit in the oven with the door open for 1 hour.
- After 1 hour, remove the cheesecake from the oven and allow it to cool to room temperature.
- Once it is cool, transfer the cheesecake to the fridge for a minimum of 4 hours (longer is actually better – I prefer to do it overnight).
To Serve:
- Remove the cheesecake from the fridge and gently and carefully remove the collar from the springform pan. Peel off any parchment paper that may be sticking to the cheesecake.
- Arrange dollops of whipped cream on the top and decorate with dehydrated orange slices (all optional).
- Slice with a very sharp knife and serve.
For the Optional Dehydrated Orange Slices:
- Preheat the oven to 200°F and line a large baking sheet with parchment paper. Slice one medium orange into thin rounds and line up in an even layer on the baking sheet.
- Bake for 2-3 hours or until the oranges are dehydrated and crisp – they will continue to crisp as they cool down.
Notes
- Using full-fat dairy and room temperature ingredients will ensure that your filling mixes together easily and smoothly – this results in a creamy cheesecake.
- All the steps outlined in the baking section are important. We want to gradually cool down the cheesecake – this reduces the chance of the cheesecake cracking. We don’t want the filling to seize from the drastic drop in temperature. Opening the oven door for 1 hour allows it to gradually and gently cool. The subsequent steps continue the gradual cool-down process. Cheesecake is not a baked good that can be rushed – so make sure you allot enough time for cooling.
- Leftover cheesecake will keep in the fridge for up to a week. I also have frozen individual slices with great results.
- Prep Time: 30 minutes
- Cook Time: 2 hours (plus chilling time)
- Category: cheesecake

I absolutely love Clementines! Anytime we would have company over, we’d always get a box of Celementines as a gift! It was awesome! I will have to try for sure!
They are one of my fav fruits! I wish they were available year round.
I just made it yesterday and it’s allready gone….my family loved it!!! Great recipe 🙂 thank you so much!
So glad you enjoyed it!
I have to say u have a few things in the recipe that make no sense such as once cool put back in oven for 4 hrs or overnight. I think you might f meant in the fridge. I am going to put it in the fridge not the oven. hat is what I am doing. Then you said the top would be brown because of the carmel in it ? What carmel ? Made this and just hoping I did it correctly.
First, sorry for the confusion! I’m human and make mistakes sometimes. I fixed the recipe to say fridge instead of oven, and the recipe was based off of a caramel version on my site, and I just missed that caramel reference when I was transferring the instructions. I hope you enjoyed the cheesecake regardless